
LUT collection · Pixelmator Pro
Pixelmator Looks
79 colour looks, sorted by effect.
Original film and portrait grades with skin tone protection, black and white with colour filters, plus recreations of classic photo app filters and current trend looks. As .cube files for Pixelmator Pro and any other app that reads 3D LUTs.
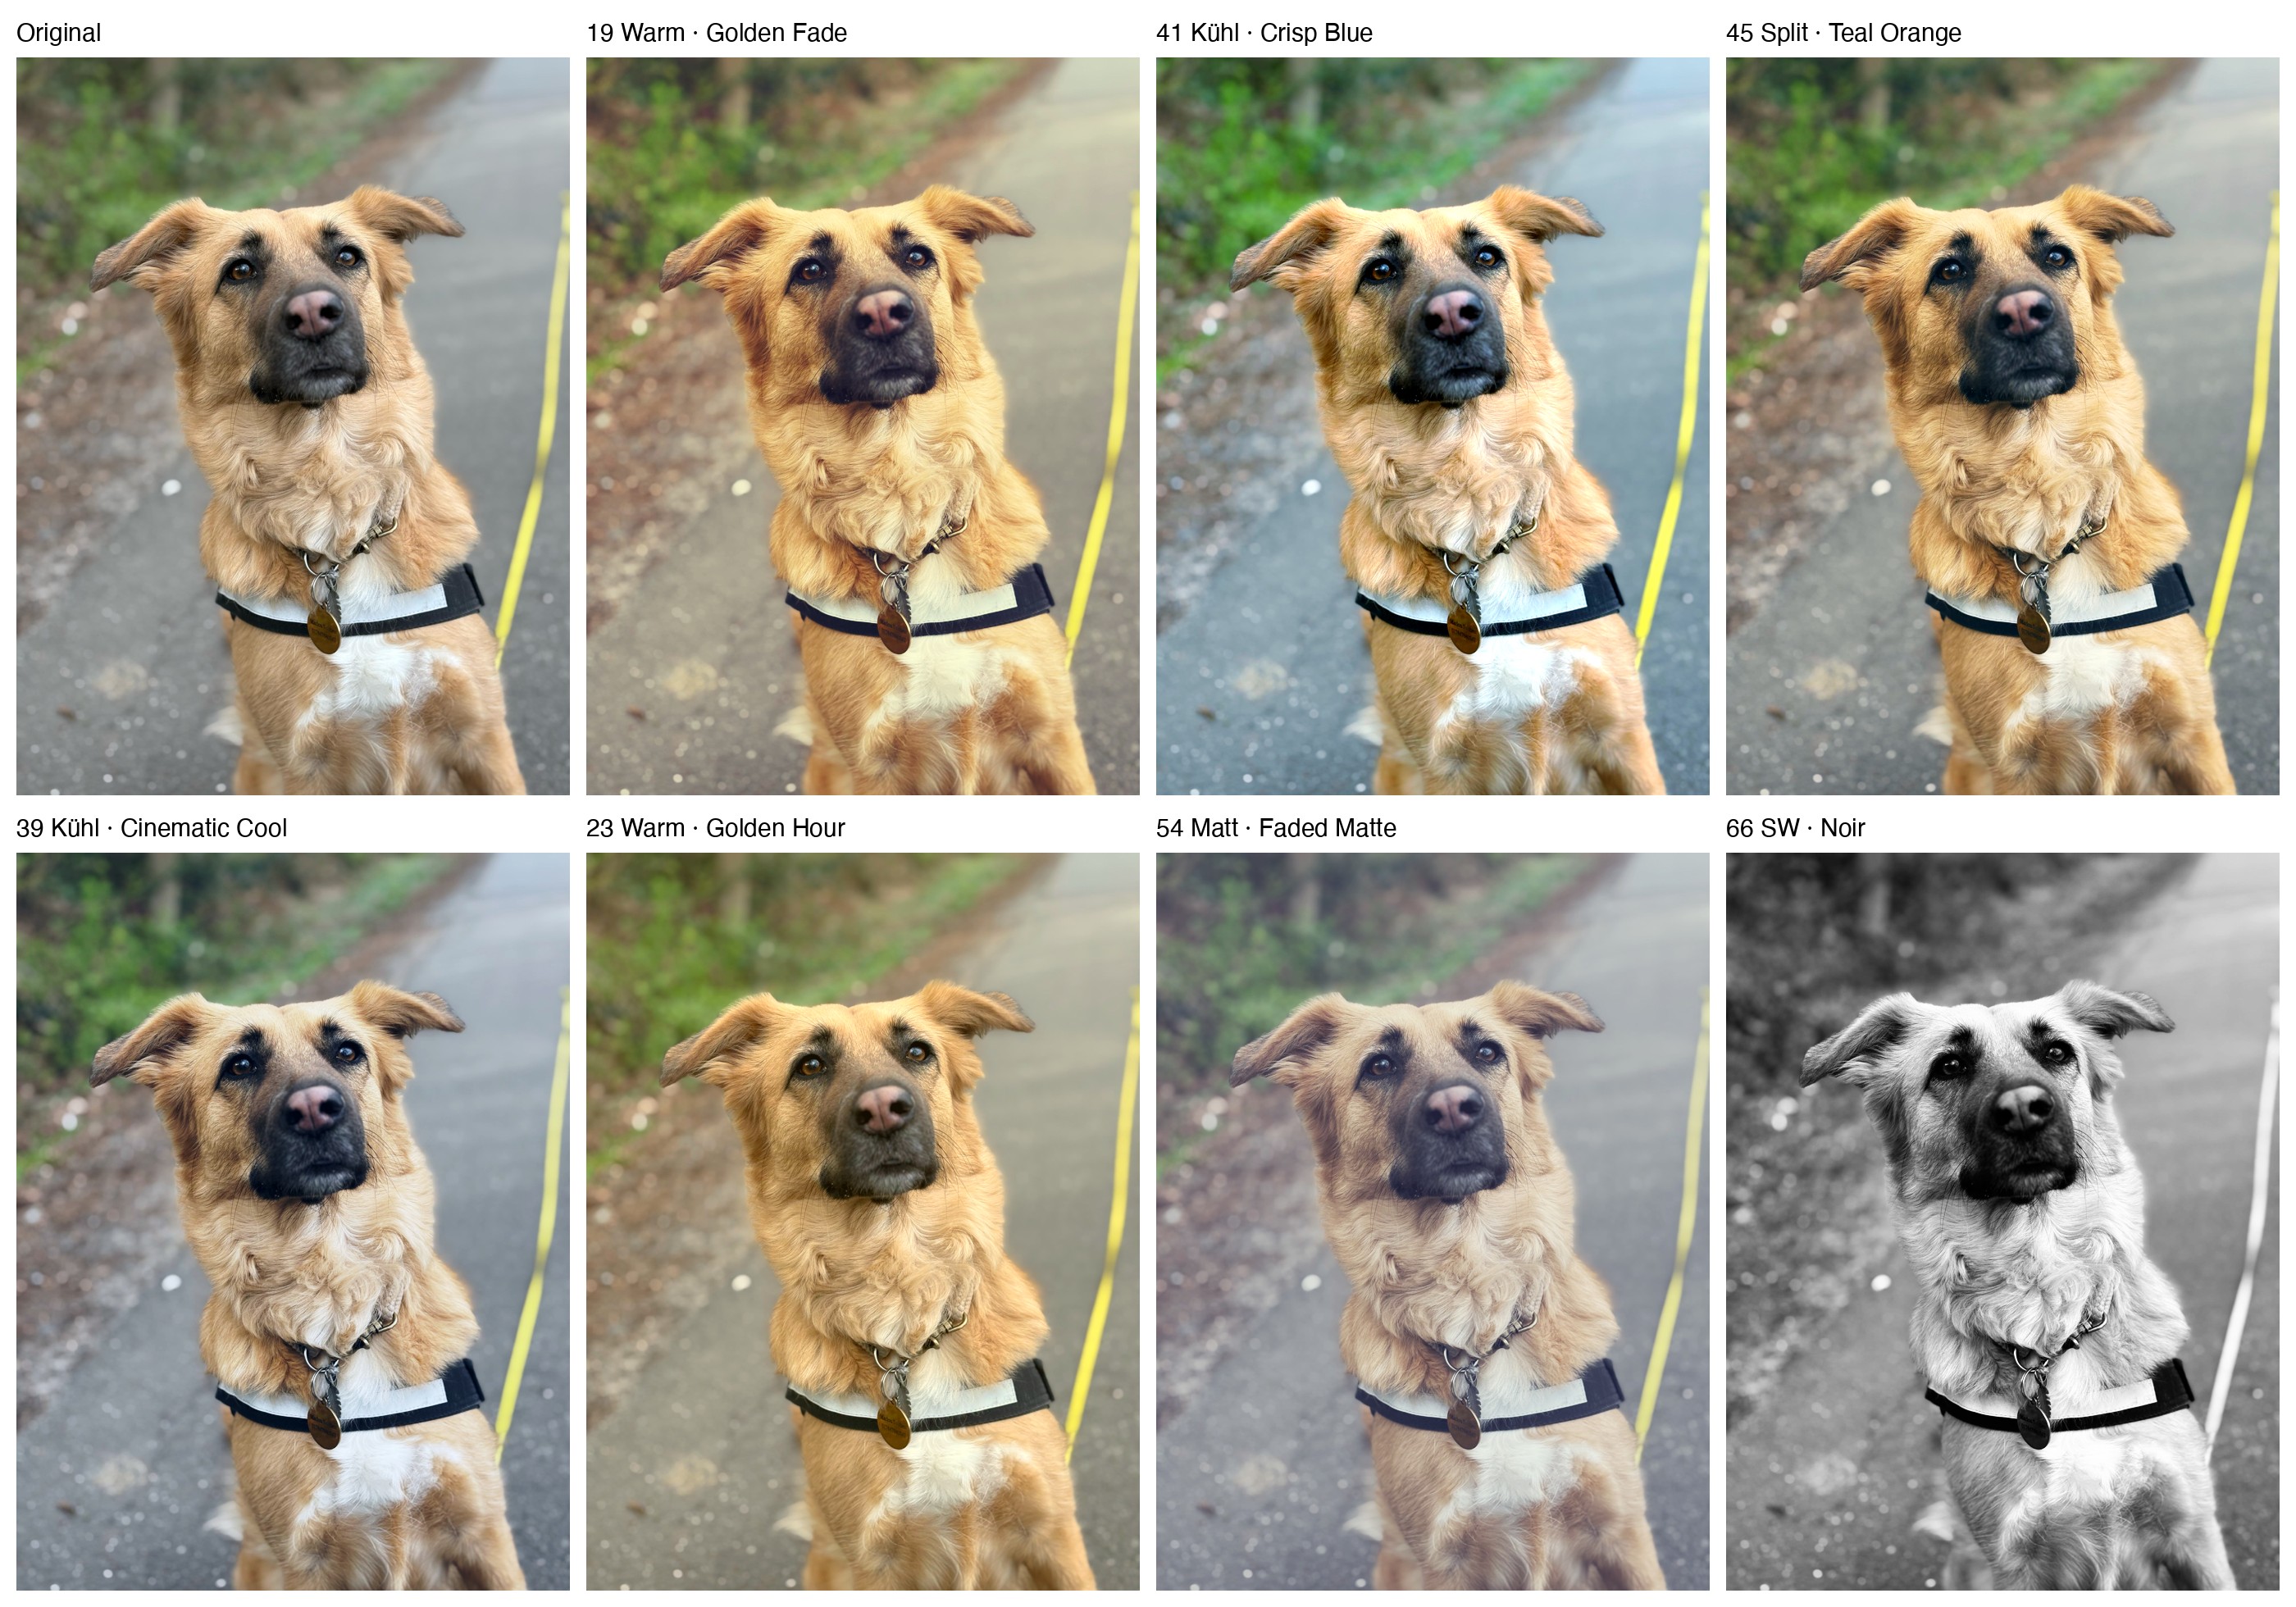
Screenshots
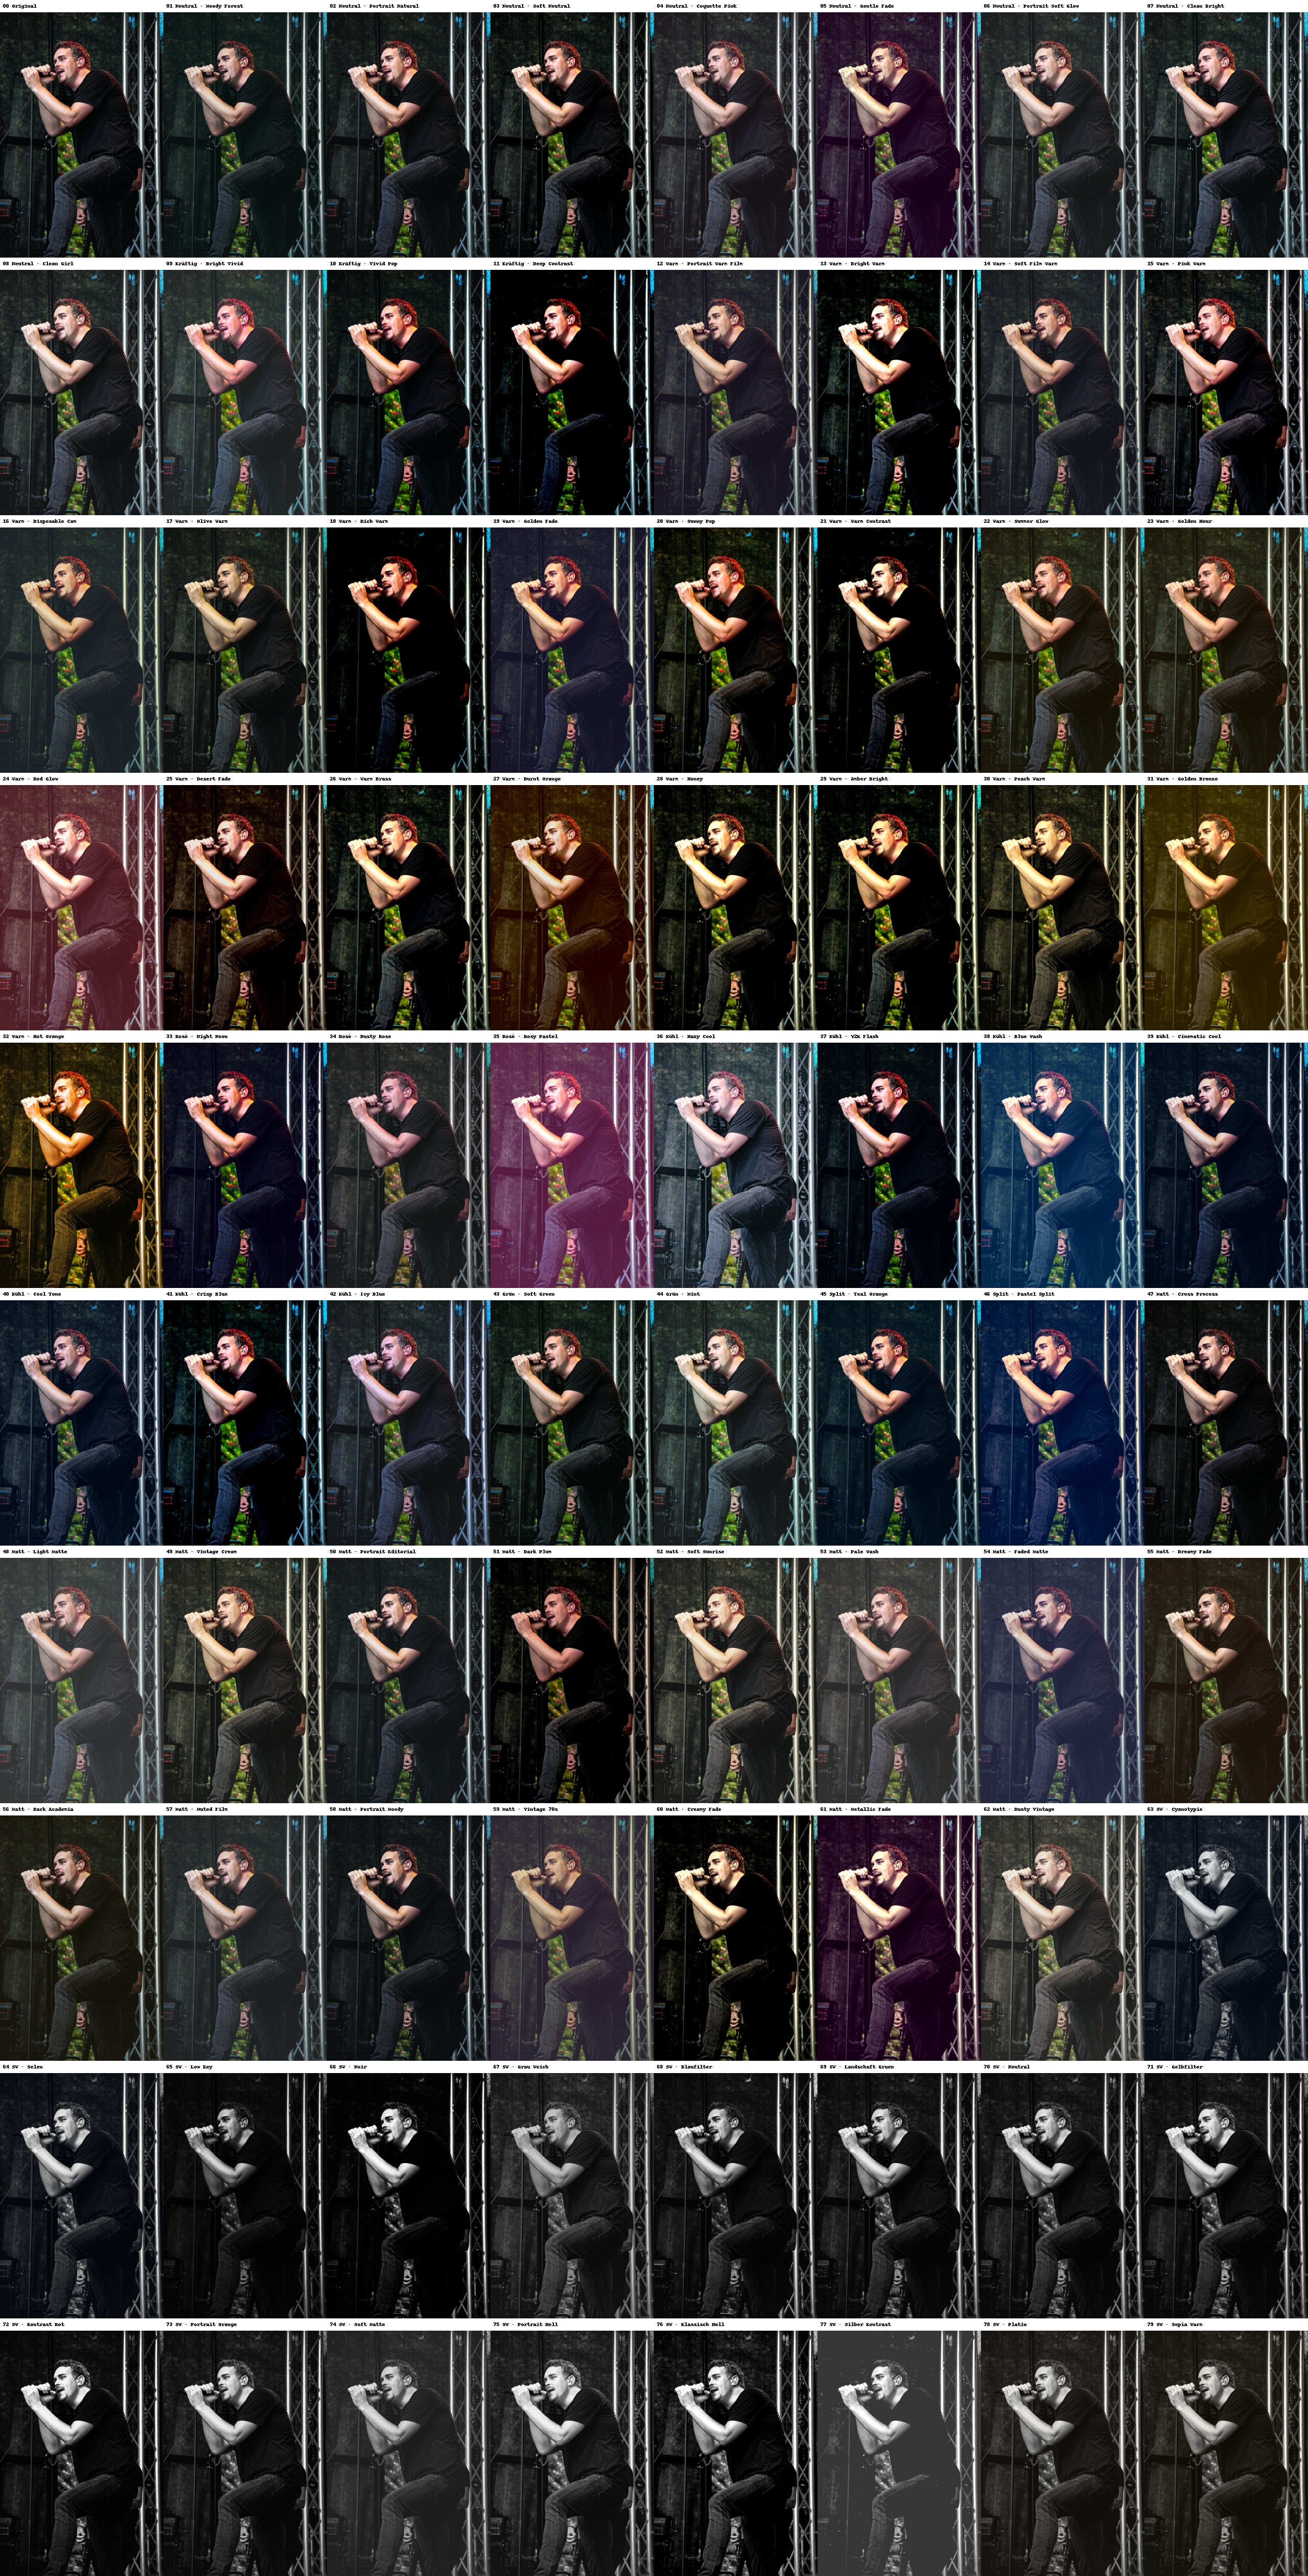
Colour groups
| No. | Group | Effect |
|---|---|---|
| 01–08 | Neutral | natural colours, only contrast and brightness changed |
| 09–11 | Vivid | strongly saturated, punchy colours |
| 12–32 | Warm | from slightly warm to strongly golden and orange |
| 33–35 | Rosé | tint towards pink and magenta |
| 36–42 | Cool | bluish, from slight to strong |
| 43–44 | Green | tint towards green and teal |
| 45–46 | Split | cool shadows, warm highlights (teal & orange) |
| 47–62 | Matte | desaturated, faded, film look |
| 63–79 | B&W | black and white, from cool (cyanotype, selenium) through neutral to warm (platinum, sepia) |
Features
Sorted by colour
Every look is measured on test colours and sorted automatically. Similar looks sit next to each other, and within each group the effect gets gradually stronger.
Skin tone protection
Looks with “Portrait” in the name keep skin tones natural, even when the rest of the image turns clearly warm, cool or matte.
Black and white with filters
17 black and white looks as if shot with classic colour filters in front of the lens: red for dramatic skies, yellow and green for landscapes, orange for portraits, blue for a harsh mood, plus toning from cyanotype through selenium to platinum and sepia.
Classics and trends
Approximations of well-known photo app filters and of current looks from short-video apps. Not exact copies, but recreations of my own.
Colour only, no artefacts
LUTs change only colours and tones. Sharpness, noise and detail stay as they are.
Use them anywhere
Standard .cube files: besides Pixelmator Pro also in Photomator, Affinity Photo, Final Cut Pro, DaVinci Resolve and other apps.
How to use the looks
- Open a photo in Pixelmator Pro.
- On the right, open Color Adjustments and add the LUT adjustment via +.
- Choose a
.cubefile in theLUTsfolder. Number and group in the file name show where the look sits in the collection. - Optionally choose Save as Preset from the adjustments menu, so the look is one click away from then on.
System requirements
- Format
- 79 × 3D LUT (.cube)
- Apps
- Pixelmator Pro, Photomator, Affinity Photo, Final Cut Pro, DaVinci Resolve and any app with LUT import
- Installation
- Installer for macOS, puts the looks with an overview and instructions in place for all users of the Mac
- Download
- Coming soon
FAQ
The look is too strong for me. What can I do?
Duplicate the layer, apply the look only to the duplicate and reduce its opacity. That way every look can be toned down smoothly.
Why are vignette, grain or sharpening missing?
A LUT can only change colours and tones. Add vignette, grain or sharpening separately in Pixelmator. For a vignette on the subject there is BodyFocus.
How do I get rid of the looks again?
Move the “Pixelmator Looks” folder in /Users/Shared to the Trash.